


🚀 Upgrade Your Print Precision with Style!
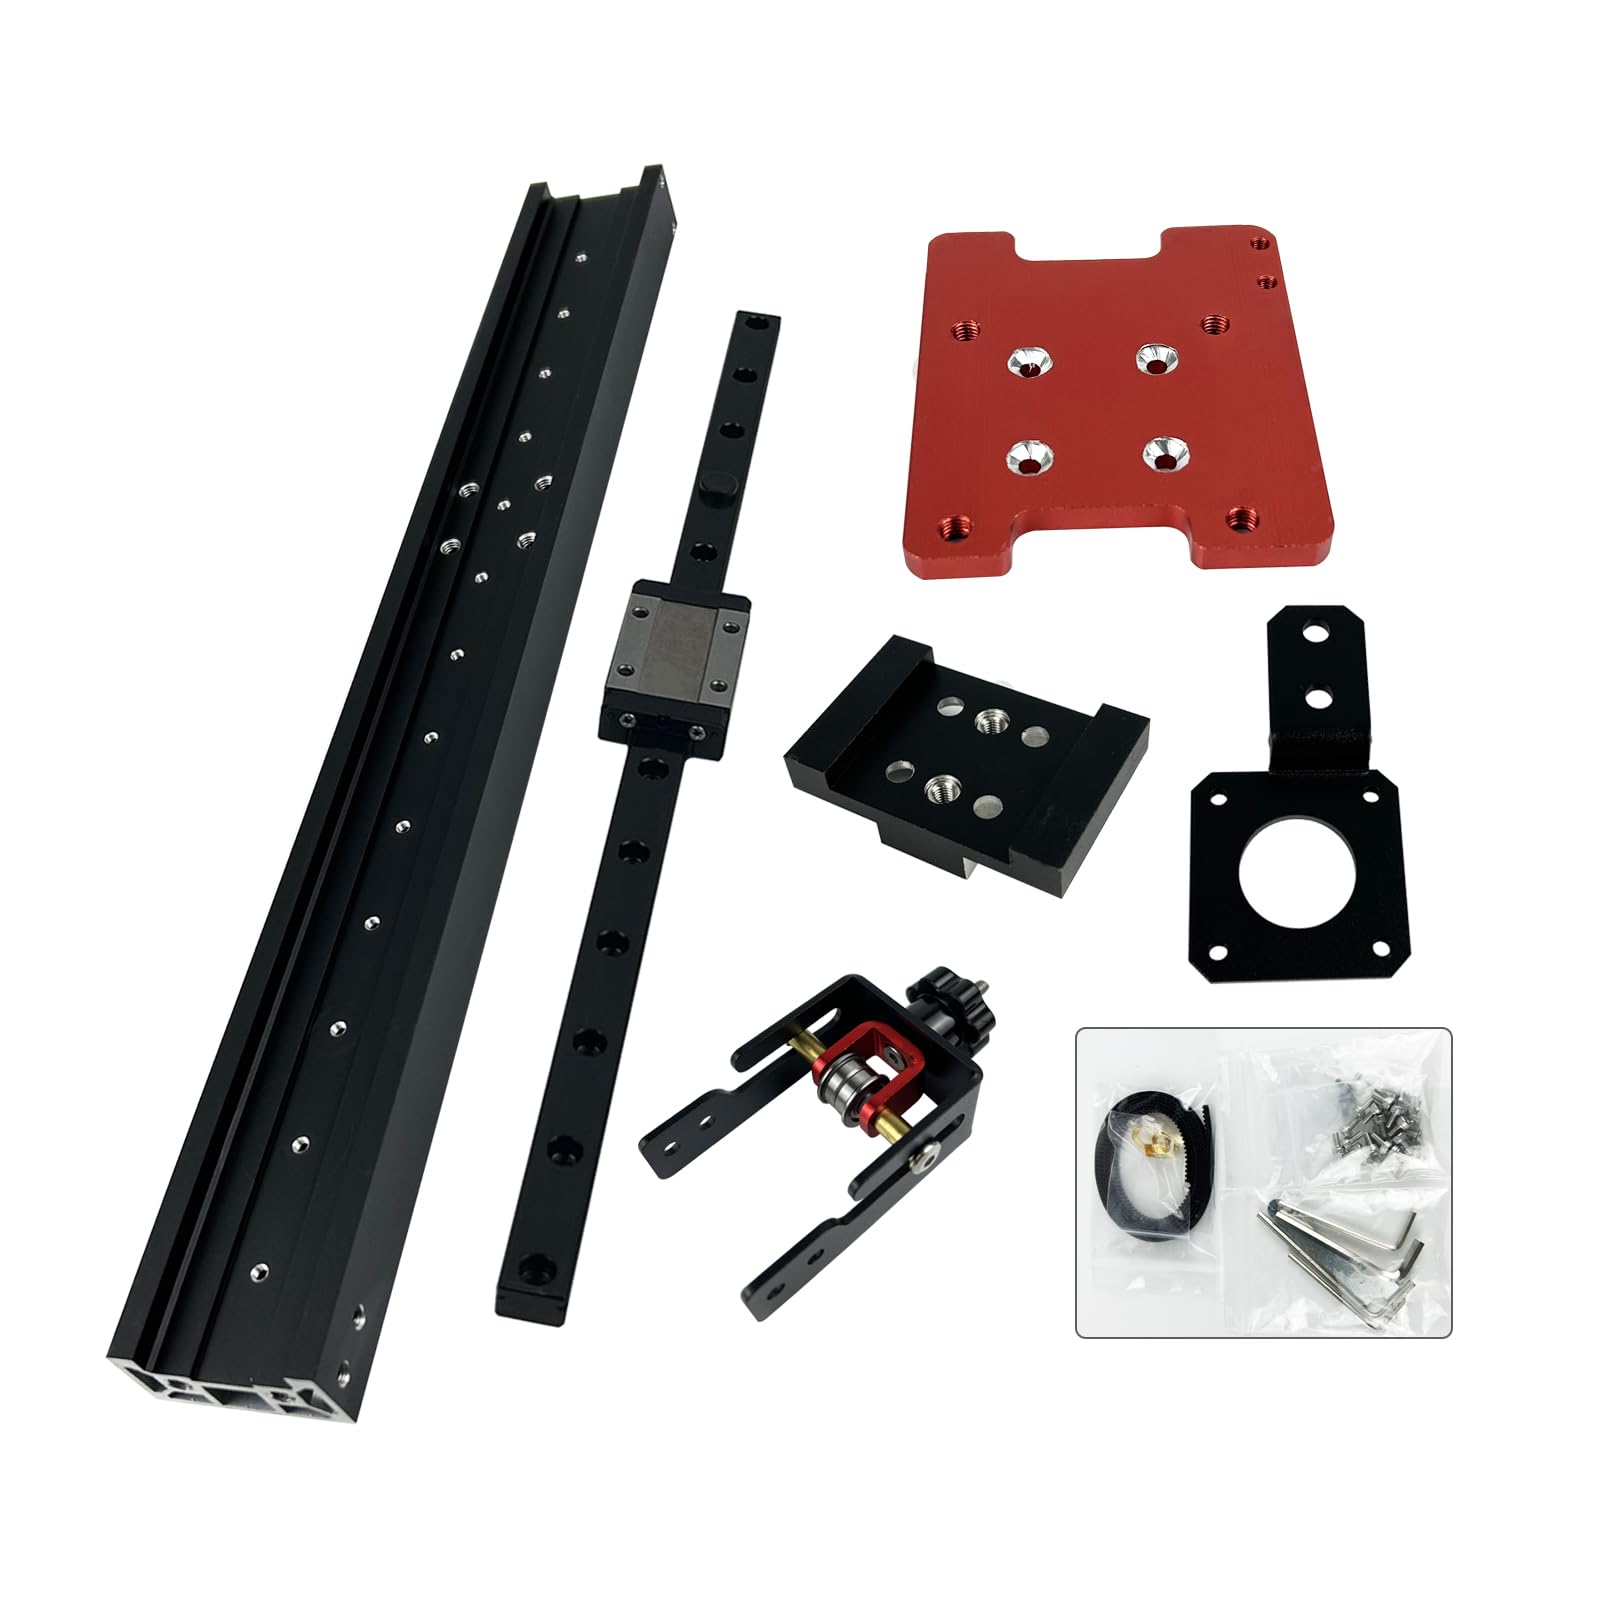
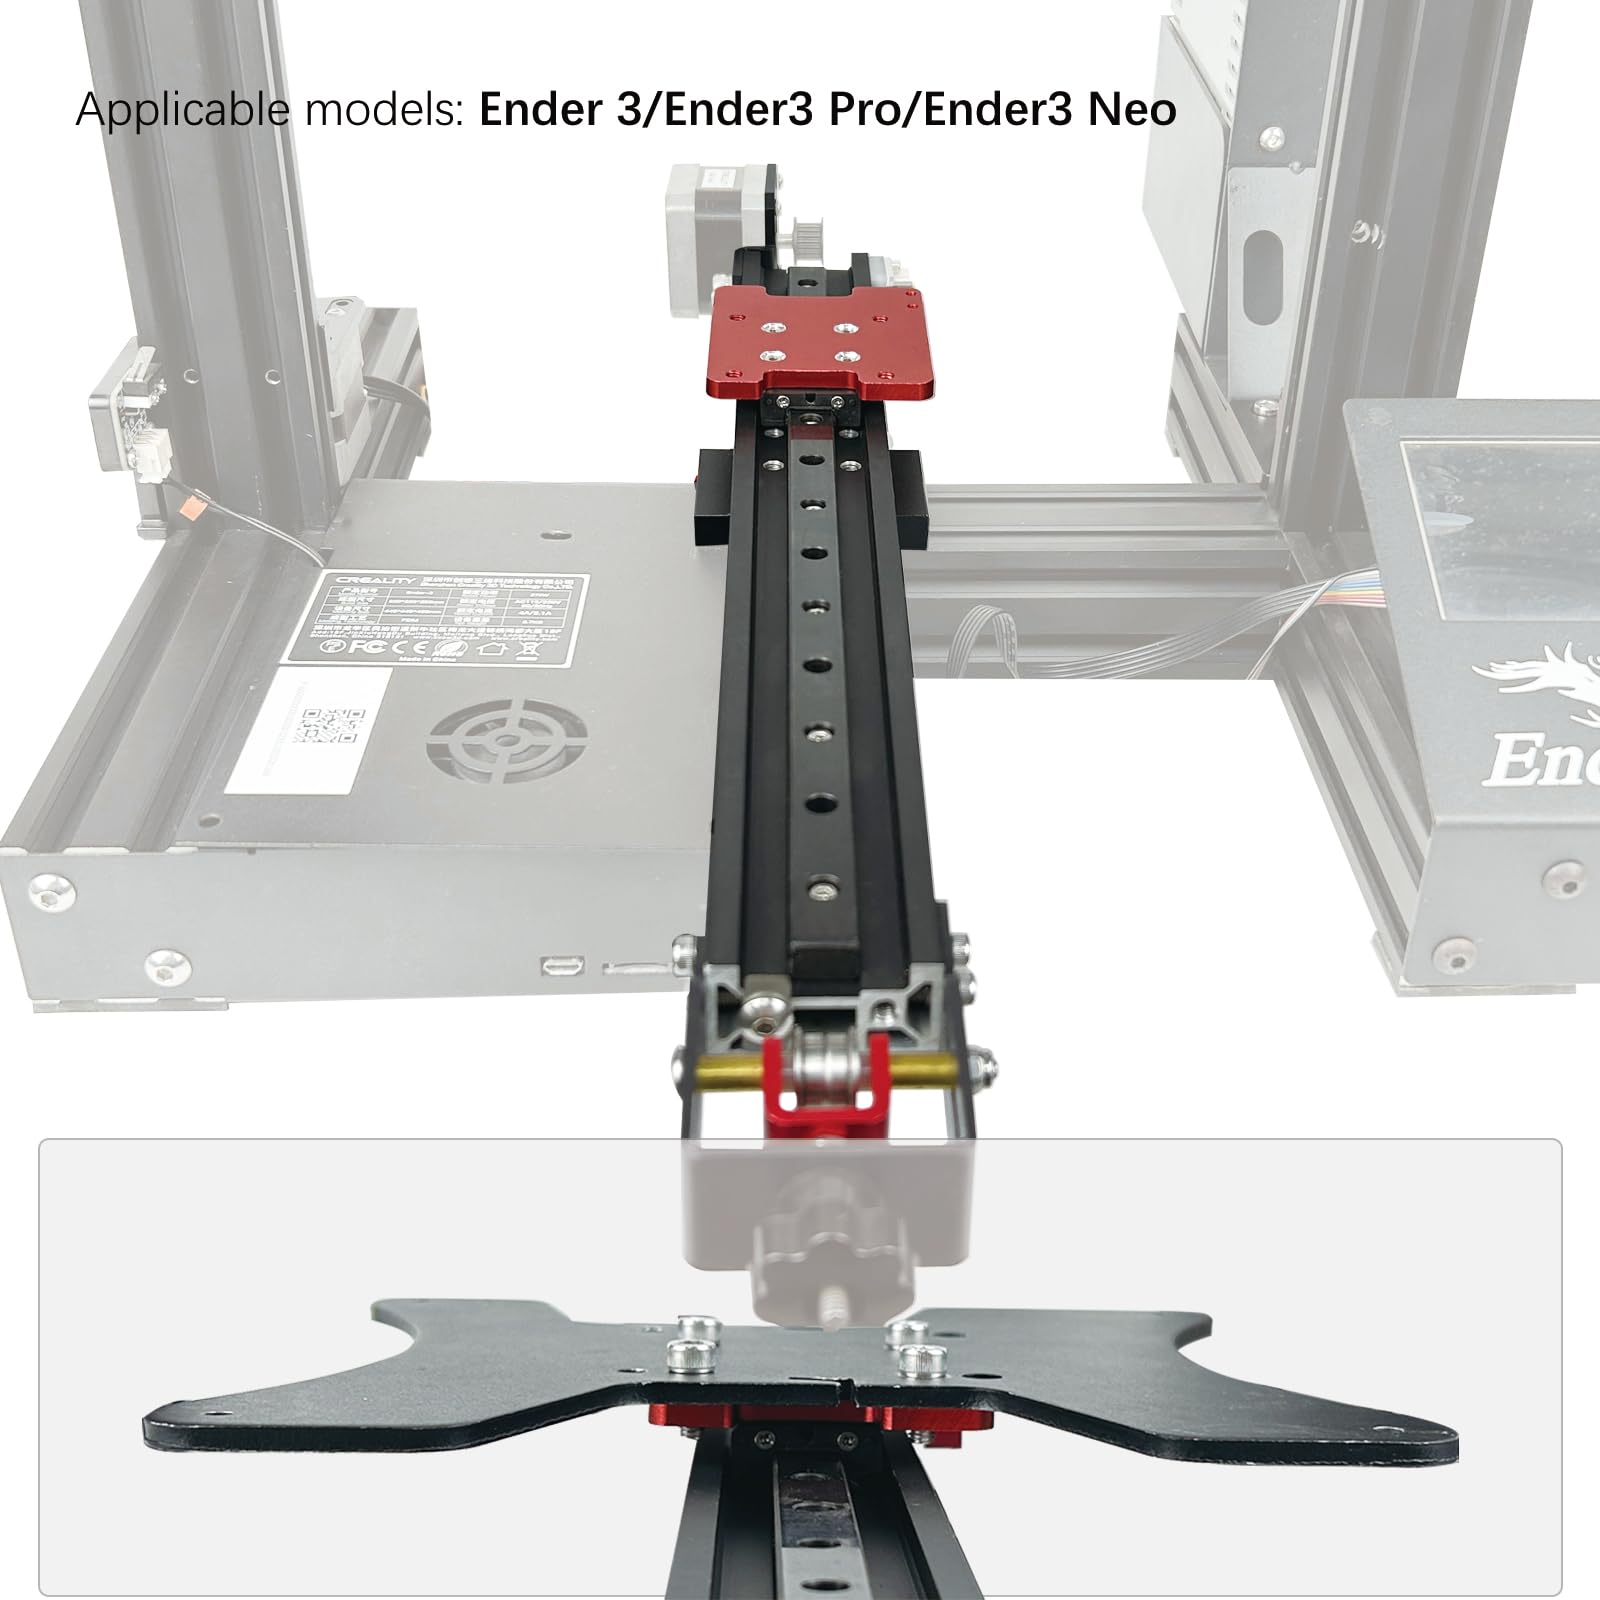
The Y-axis MGN12H Linear Rail Guide Kit V3.2 is a specialized upgrade designed for Creality Ender 3/3 PRO/3 NEO 3D printers. This kit includes a custom 4020 profile linear rail, stainless steel carriage blocks, and all necessary installation accessories. Engineered for improved stability and speed, it features durable materials and a rust-resistant finish, making it a perfect choice for serious 3D printing enthusiasts.
J**D
Top quality.Im not kidding
Beautifully made, fits perfectly. Well packaged, full & clear instructions.Installation does require a bit of disassembly of your printer. All you need is some grease for the linear rail. Brilliant upgrade.
D**E
Installed on Ender3
Instructions were straight forward. Used everything thats included with this kit. I think one thing that it should come with is grease. I didn't worry about it since I had some on hand. Other than that, I'm pretty happy with it.
T**N
Not quite for Ender 3 Pro but can be made to work
I was going to give a bad rating for this. But instead I thought I'd provide info on what I did to resolve some of my issues with this kit. Because overall it doesn't seem to be a bad kit. There's just some fitment issues.I bought this kit to upgrade the Y-Axis on my ender 3 pro, as I had a terrible issue with the bed wobbling and didn't want to mess with the roller options any more. I followed the instructions as they where provided to install on a ender 3 pro. This is where I identified a couple of problems with the instructions.In the instructions they tell you to install this plastic spacer they provide behind the limit switch and attach to the the orginal bracket it was mounted on. Then your instructed on the location to mount the bracket that triggers that switch. What I found at least in my case is that bracket kept missing the trigger switch. I removed that plastic spacer off the limit switch and reinstalled it with the original screws it came with. This resolved that issue. But I still that I may need to do some tweaking as I don't think it's triggering soon enough.The second issue I found is that the new Y-Axis support rail is about half the height of the orginal. So if you mount it in the orginal slot that's cut out of the bottom gantry support rail it sits way too low for the Z-Axis to even come down to touch the build plate. This is due to the bracket that supports the X-Axis and Z-Axis motors hitting the gantry support rail preventing it from going down any lower. My solutions was to unbolt the bottom gantry support rail and flipping it 180 so that the orginal cutout was on the bottom, allowing me to mount the new Y-Axis rail flush on top using the bolts the kit provided.After doing this I was able to level my bed and perform a successful test print.However I still have a couple of issues to resolve. Since I turned the bottom gantry support rail 180 degrees. I now no longer have the predrilled holes provided to insert the screws needing to tie down the back portion of the controller case. Another issue that I've run into is now that the bottom gantry support brack is essentially upside down. The channel all the wiring ran through is now on the top instead of the bottom. I've had to use some zip ties to pull them out of the way of the bed.As I'm writing up this review I'm thinking of doing one of two things. Flipping the bottom gantry support back to the way it was and going to the hardware store for some longer bolts and some spacers. I'm also considering 3d Printing something to fill that space and of course using some longer bolts as well. So I have options. If I figure out or decide that I need to tweak something with the y-axis trigger switch I'll post an update to that.So those of you who have an Ender 3 Pro and order this kit and can't get it to work for you. I hope what I provided helps you out.
D**W
X axis kit is well designed and installs fairly well, even for a dum guy like me.
All parts for my Ender 3-v2 went together well, even with the other mods I did at the same time. It took me many hours to install the X axis, but keep in mind, I was doing the Y, and Z axis, and direct drive and dual Z drive and belt conversion all at the same time. But, I can imagine, if just doing the X axis, maybe 2 to 4 hours messing around. Take your time, only snug hardware until all is installed, align, then tighten fasteners with purpose.
J**D
Meh and over engineered
I am going to end up switching to a dual linear rail design for the Y carriage, this just doesn't cut it for me. It works though. The design seems a little poorly planned. I do like that the extrusion has holes specifically for the linear rail, but the capture nuts work decent as well when you have this many, not a huge difference there.
A**R
Great fit
Perfect for Ender 3v2. Well thought out kit
J**Y
Quality of a high-school lead project.
Jagged metal sticks out in the area for your belt. You will need a foot long file to clean up their poor QC.They also sent me a partial kit. It didn't have the motor bracket.The slide came poorly packaged. BBs were everywhere.Amazon is sending an exact replacement. This company has very very low QC.It's also missing scres long enough to reach through the parts they sent to attach to the frame...
D**D
Vastly improved reliability
Excellent system and well worth it for the upgrade to my Ender 3 Pro. I was skeptical at how much of an improvement in print performance a linear rail system like this could make, but once I installed it I was quite pleased. I would definitely recommend it to anyone else who is interested in upgrading their system. It has been virtually zero maintenance since I installed it and provided a much smoother motion than the stock system.
Trustpilot
3 days ago
2 months ago
2 weeks ago
3 days ago


